Windows Deployment Services
Windows Deployment Services (WDS) enables installing operating systems from your local network. WDS requires you to have Active Directory Domain Service, DHCP Server and DNS Server. The BIOS of the client machine the operating system is going to be installed on must support and have enabled network (PxE) booting.
Sisällysluettelo
Installation
Install the WDS role from Server Manager.
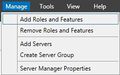
- Begin installation Manage -> Add Roles and Features
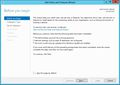
- Read Before you begin and select NEXT
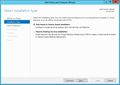
- We select Role-based or Feature-based installation and install the WDS role on one server.
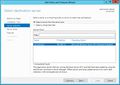
- We select the server the role is to be installed on.
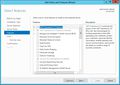
- We select the WDS role.
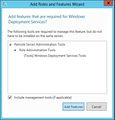
- Select Add Feature, the role's control panel is now enabled.
- We skip the Feature tab, NEXT
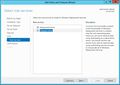
- Read the description of the WDS role.
- We select all the features of the WDS role.
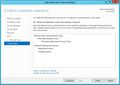
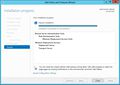
- Confirm installation INSTALL
- The role is now installed.
1
2
3
4
6
7

8
9
10
11


Configuration
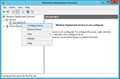
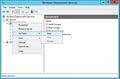
- Open Windows Deployment Services from the Server Manager. Using the right mouse button, select Configure Server from the list.
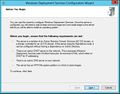
- Read before continuing.
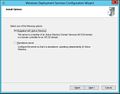
- Select how to install WDS: * Integrated in Active Directory Domain Service * Standalone Server
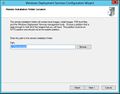
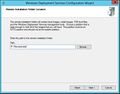
- Select where the WDS server is to be installed. It must be an NTFS partition and can not be a system partition.
- For instance on the root of the R drive.
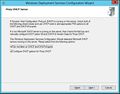
- Define Proxy DHCP server
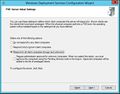
- Define who is allowed to use the WDS service
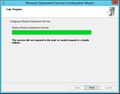
- Installing service
- If you encountered an error, start the service manually.
1
2
3
4
5
6
7
8
9
10


Add boot image
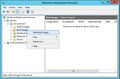
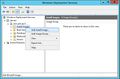
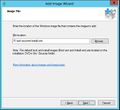
- Select Boot Image with the right mouse button and press Add Boot Image
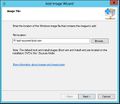
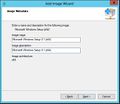
- Select the location of the boot image. For this you can extract a Windows ISO file and get the boot.win file.
- Define a name for the image.
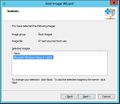
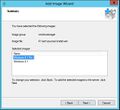
- Before continuing, make sure you defined everything right.
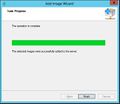
- Boot Image has been successfully created.
1
2
3
4
5


Add installation image
- With the right mouse button select Add Install Image
- Select image location. In an extracted Windows iso file this is called install.wim.
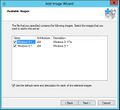
- Select the images to be added to the WDS server.
- Confirm changes.
1
2
3
4


We change the WDS boot menu into a third party boot menu. We use Syslinux.
WDS service is installed under the D:\RemoteInstall directory.
1. Download and extract the syslinux installation file.
2. Copy the com\vesamenu32.c32 and com32\modules\chain.c32 files into the D:\RemoteInstall\Boot\x64 and D:\RemoteInstall\Boot\x86 directories, respectively.
3. Copy the core\pxelinux.0 file into the WDS server's D:\RemoteInstall\Boot\x64 and D:\RemoteInstall\Boot\x64 directories and in both of them change the name of the file pxelinux0 to pxelinux.com. It is recommended to backup the old file before doing this.
4. In the D:\RemoteInstall\Boot\x64 and D:\RemoteInstall\Boot\x86 directories, copy pxeboot.n12 and rename it to pxeboot.0.
5. In the D:\RemoteInstall\Boot\x64 and D:\RemoteInstall\Boot\x86 directory copy abortpxe.com rename it to abortpxe.0
6. Configre WDS to use the pxelinux.com boot file, this is done in the command line.
WDSUTIL /Set-Server /BootProgram:boot\x86\pxelinux.com /Architecture:x86

WDSUTIL /Set-Server /N12BootProgram:boot\x86\pxelinux.com /Architecture:x86

WDSUTIL /Set-Server /BootProgram:boot\x64\pxelinux.com /Architecture:x64

WDSUTIL /Set-Server /N12BootProgram:boot\x64\pxelinux.com /Architecture:x64
7. Create a folder called pxelinux.cfg in the D:\RemoteInstall\Boot\x64 and D:\RemoteInstall\Boot\x86 directories.
8. Create a fifle called default (no file extension) under the pxelinux.cfg directory.
9. Open the default file and write this there:
DEFAULT      vesamenu.c32
PROMPT       0
NOESCAPE     0
ALLOWOPTIONS 0
# Timeout in units of 1/10 s
TIMEOUT 300
MENU WIDTH 40
MENU MARGIN 0
MENU ROWS 12
MENU TIMEOUTROW 14
MENU HSHIFT 5
MENU VSHIFT 2
MENU COLOR BORDER 30;44       #00000000 #00000000 none
MENU COLOR TABMSG 1;36;44     #00000000 #00000000 none
MENU COLOR TITLE 1;36;44     #00000000 #00000000 none
MENU COLOR SEL   30;47       #40000000 #20ffffff
MENU TITLE PXE Boot menu
MENU WIDTH 80
MENU MARGIN 18
MENU ROWS 4
LABEL wds
 MENU       DEFAULT
# MENU PASSWD P@ssw0rd
 MENU       LABEL Windows Deployment Services
 KERNEL     pxeboot.0
LABEL local
 MENU LABEL Boot from Harddisk
 LOCALBOOT 0
LABEL Abort
 MENU LABEL AbortPXE
 KERNEL     abortpxe.0
Sources
http://www.deployvista.com/Home/tabid/36/EntryID/126/language/en-US/Default.aspx