Ero sivun ”RouterOS DHCP/en” versioiden välillä
(Ak: Uusi sivu: Make sure you have defined a static IP address for the Mikrotik router. In our example we use the 192.168.100.0 /24 network. In Mikrotik we have assigned the first address of the n...) |
(Ak: Uusi sivu: 1. We create a DHCP pool. In our example the pool assigns addresses between 192.168.100.10 and 192.167.100.200.) |
||
| Rivi 8: | Rivi 8: | ||
Make sure you have defined a static IP address for the Mikrotik router. In our example we use the 192.168.100.0 /24 network. In Mikrotik we have assigned the first address of the network to be 192.168.100.1 /24. Note, that Mikrotik starts assigning addresses from the address pool's end instead of the start like most DHCP servers. | Make sure you have defined a static IP address for the Mikrotik router. In our example we use the 192.168.100.0 /24 network. In Mikrotik we have assigned the first address of the network to be 192.168.100.1 /24. Note, that Mikrotik starts assigning addresses from the address pool's end instead of the start like most DHCP servers. | ||
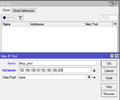
| − | 1. | + | 1. We create a DHCP pool. In our example the pool assigns addresses between 192.168.100.10 and 192.167.100.200. |
/ip pool add name=dhcp_pool address=192.168.100.10-192.168.100.200 | /ip pool add name=dhcp_pool address=192.168.100.10-192.168.100.200 | ||
Versio 21. elokuuta 2015 kello 07.30
With DHCP (Dynamic Host Configuration Protocol) it is easy to manage and assign IP-addresses for client devices in your network. Mikrotik RouterOS has DHCP client and DHCP server support.
Sisällysluettelo
DHCP Server
Make sure you have defined a static IP address for the Mikrotik router. In our example we use the 192.168.100.0 /24 network. In Mikrotik we have assigned the first address of the network to be 192.168.100.1 /24. Note, that Mikrotik starts assigning addresses from the address pool's end instead of the start like most DHCP servers.
1. We create a DHCP pool. In our example the pool assigns addresses between 192.168.100.10 and 192.167.100.200.
/ip pool add name=dhcp_pool address=192.168.100.10-192.168.100.200
2. Luodaan uusi DHCP:n jako asetukset. Tähän määritetään verkon oletusyhdyskäytävä ja DNS palvelimet.
/ip dhcp-server network add address=192.168.100.0/24 gateway=192.168.100.1 netmask=24 dns-server=192.168.100.1
3. Luodaan DHCP server. Tähän määritetään mihin porttiin DHCP jaetaan ja mistä poolista (lisätään juuri äskettäin luotu pool) ja lease time (varausaika).
/ip dhcp-server add name=dhcp-server interface=ether1 lease-time=24:00:00 address-pool=dhcp_pool
DHCP varaus
DHCP varauksella voit määrittää DHCP palvelimelle asiakaslaitteen MAC-osoitteen. Kun määritetty MAC-osoite yhdistää verkkoon jossa DHCP palvelin on, tämä antaa ennalta määritetyn IP-osoitteen kyseiselle asiakaslaitteelle.
/ip dhcp-server lease add address=192.168.100.100 mac-address=11:22:33:44:55:66
Mikrotik ja Windows Deployment Services
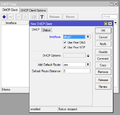
Tässä esimerkki miten saa Mikrotikin DHCP:n toimimaan WDS:n kanssa. Määritä kuvankaappausten perusteella lisäasetukset DHCP palvelulle.
 Next Server = WDS-palvelimen IP-osoite
 Boot File Name = Tiedosto joka ladataan ensimmäisenä WDS palvelimesta
 DHCP Options = 060 PXEClient
DHCP Client
DHCP Client ominaisuus mahdollistaa Mikrotikin verkkoasetusten hakemisen DHCP palvelimelta.
/ip dhcp-client add interface=ether1 disable=no
- Interface = Portti josta pyydetään DHCP paketit
- disable no = Otetaan käyttöön


