Ero sivun ”RouterOS Firewall/en” versioiden välillä
(Ak: Uusi sivu: Now we have the basic firewall configurations set up. The firewall works from the top to down (0 ->) along the list. By default everything is allowed unless otherwise is mentioned.) |
(Ak: Uusi sivu: === Block outside access to the management ports ===) |
||
| Rivi 74: | Rivi 74: | ||
</gallery> | </gallery> | ||
| − | === | + | === Block outside access to the management ports === |
Estetään ulkoverkosta pääsy hallintaportteihin 21, 22, 23, 80 ulkoverkosta. Tämä suojaa Mikrotikkiä ettei ulkopuolinen pääse laitteeseen käsiksi helpolla. | Estetään ulkoverkosta pääsy hallintaportteihin 21, 22, 23, 80 ulkoverkosta. Tämä suojaa Mikrotikkiä ettei ulkopuolinen pääse laitteeseen käsiksi helpolla. | ||
Versio 21. elokuuta 2015 kello 07.21
With the firewall we can filter packages and enable other kinds of security options, which either block or allow access to the network / router. Used in unison with a NAT, this significantly helps in blocking unauthorized outside access to your internal network.
RouterOS firewall mainly follows the same logic as Linux when it comes to Iptables.
Firewall settings are in the RouterOS system:
/ip firewall
Sisällysluettelo
Filter Rules
With filter rules you can limit the transmission of packages to the router or through the router. Note, that in the RouterOS operating system firewall rules are created from the top down.
Basic firewall
In our example we create a secure and basic RouterOS firewall which suits the needs of all basic users.
First we create a new allow rule, which always allows connecting to the router from whatever network and with whatever protocol. You should do this in order to not accidentally lock yourself outside of the router while you work.
/ip firewall filter add chain=input action=accept
We create a second firewall rule which allows traffic through the router. The connection must be trusted though.
/ip firewall filter add chain=forward connection-state=established,related action=accept
We block invalid connections from going through the router.
/ip firewall filter add chain=forward connection-state=invalid action=drop
Next we select the ICMP protocol, the so called ping protocol. This allows the routed to be pinged with a client device, which is connected to the Mikrotik. Useful for troubleshooting.
/ip firewall filter add chain=input protocol=icmp action=accept
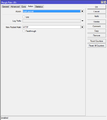
Next we create a rule which blocks incoming traffic from the ether1 (WAN) port.
/ip firewall filter add chain=input in-interface=ether1 action=drop
Now we have the basic firewall configurations set up. The firewall works from the top to down (0 ->) along the list. By default everything is allowed unless otherwise is mentioned.
/ip firewall filter print
Block outside access to the management ports
Estetään ulkoverkosta pääsy hallintaportteihin 21, 22, 23, 80 ulkoverkosta. Tämä suojaa Mikrotikkiä ettei ulkopuolinen pääse laitteeseen käsiksi helpolla.
/ip firewall filter add chain=input protocol=tcp dst-port=21,22,23,80 in-interface=ether1 action=drop
NAT
NAT:ista meillä on oma artikkeli: RouterOS NAT
Mangle
Mangle:n avulla voit merkata paketit erityisellä merkillä. Voit lisätä merkin pakettiin ja käyttää esimerkiksi Queue:ssa, NAT:issa ja reitittämisessä. Mangle:n merkit ovat vain nykyisen reitittimen merkkejä, eli niitä ei lähetetä verkossa eteenpäin.
Marking Packets
Merkataan esimerkiksi interface:n ether1-gateway:n portissa 80 menevät paketit.
/ip firewall mangle add chain=forward protocol=tcp dst-port=80 in-interface=ether1-gateway action=mark-packet new-packet-mark=HTTP
Aiheeseen liittyvää
Lähteet
http://wiki.mikrotik.com/wiki/Manual:IP/Firewall/Filter http://wiki.mikrotik.com/wiki/Manual:IP/Firewall/Mangle

